Table of Contents
Installing Magisk is usually easy… but not so much when installing it on an Android x86 emulator. After much trial and error I’ve figured out how to - it’s quite easy with a few manual steps!
Pre-requisites & Setup
- Android x86 emulator - I used android OS 9.0 running on Proxmox VE Hypervisor
- Magisk apk - I used v28 which was the latest version at the time of writing
- Linux OS (I used Ubuntu) with
adbinstalled (for connecting to the emulator) - with some understanding of how to use adb
Before you Start
-
I have not tested this with Android x86 running on Virtualbox, but I don’t see why it wouldn’t work. However, someone did write up a solution for it.
-
Make sure your android-x86 is installed with read/write permissions (done at the installation process of android x86).

-
Whilst there are multiple solutions to this 1. 2 that I tried, but I could not get them to work (maybe because it only works with VirtualBox or older versions of android x86?).
-
Supposedly due x86 being an uncommon architecture you can expect bugs (probably why I can’t install some modules after I’ve installed Magisk).
1. Install Tools on Linux
Install the following tools:
android-tools-mkbootimgabootimg
sudo apt install android-tools-mkbootimg abootimg
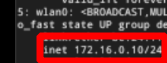
2. Connect your emulator via ADB
To find your device IP you can open the terminal on the emulator and type ip a, mine was underwlan0
adb connect (ip of emulator):5555
The terminal emulator:
3. Copy Boot files from Android x86 Folder
- Create a folder in the android emulator:
adb -e shell "mkdir /data/local/tmp/root" - Mount the android x86 folder to that folder (you will need Superuser permission hence the
suin the command)adb -e shell "su -c 'mount /dev/block/sda1 /data/local/tmp/root'" - Navigate to the android x86 folder, and you will see the files we need to copy to your Linux environment (
ramdisk.imgandkernel). Memorize the file paths of these 2 files then copy them usingadb pull.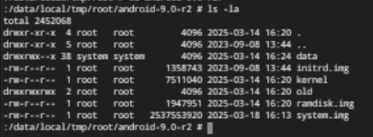
adb pull /data/local/tmp/root/android-9.0-r2/kernel
adb pull /data/local/tmp/root/android-9.0-r2/ramdisk.img
4. Pack the Files
Run This command on your Linux environment where you store the copied ramdisk.img and kernel files, and it will output a boot.img file.
We will copy this generated file back to the Emulator.
mkbootimg --kernel kernel --ramdisk ramdisk.img --output boot.img
5. Install the Magisk App on the Emulator
Before we continue you need to install the Magisk app in order to patch the boot.img file.
Either download the apk to your computer and install it using the following command or install it via the emulator (Note at the time of writing v28 was the latest version).
adb install magisk.apk
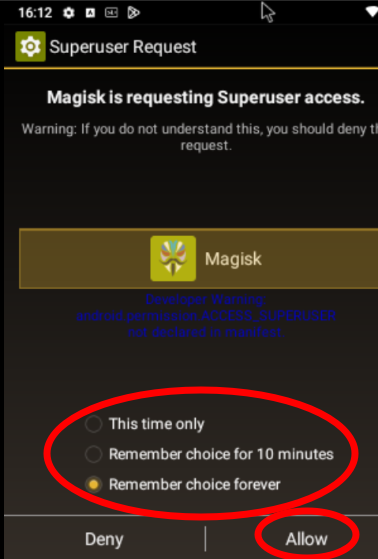
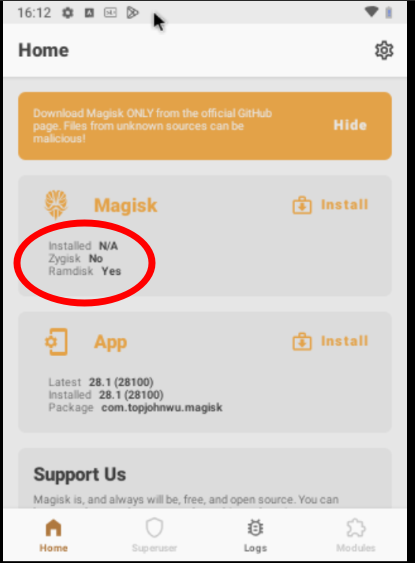
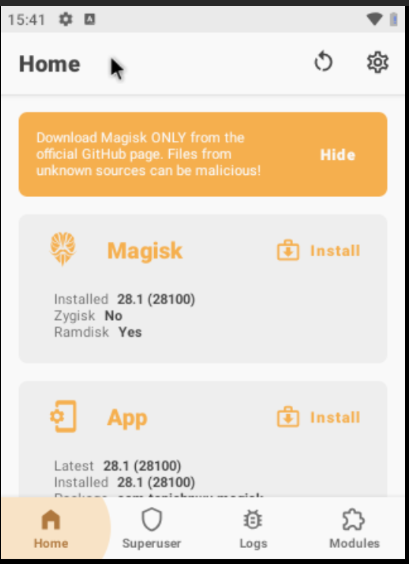
Open the Magisk app and it enable Superuser permissions:
You will see that your emulator is NOT rooted:
6. Patch the Boot File
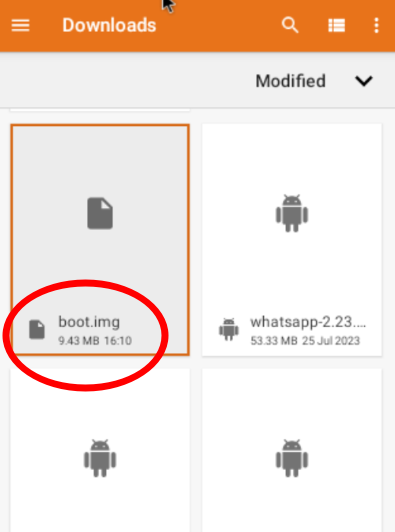
- Copy the
boot.imgto some folder on the emulator that can be accessed easily (I just copied it to the download folder)adb push boot.img /sdcard/Download -
Open the Magisk app and click install and find the
boot.imgand patch it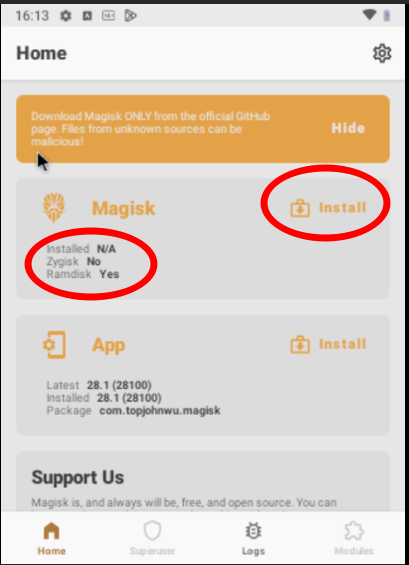
- Once done it will output some
patch_boot.imgfile in the same folder you uploaded theboot.imgfrom (for me, it will be in the Downloads folder. Note: I renamed mine to start with “emu-4”, you don’t need to do that)
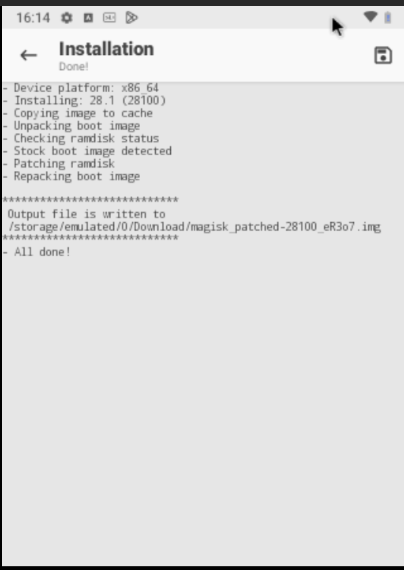
Note: ignore the different file name on the output logs - I screenshotted the wrong emlulator I was working on.
7. Extract and Create New Boot Image
- Copy the
patch_boot.img(for my example mine was calledmagisk_patched-28100_eR3o7.img) from the emulator to your Linux environment.adb pull /sdcard/Download/magisk_patched-28100_eR3o7.img - Run this command to generate the new boot files from the
patch_boot.img.abootimg -x magisk_patched-28100_eR3o7.img - The previous command will generate 3 files, rename 2 the files:
zImage→kernelinitrd.img→ramdisk.img
- copy these 2 files to the temporary android x86 folder we created earlier
adb push kernel /sdcard/Download adb push ramdisk.img /sdcard/Download - connect to the emulator using adb shell and
suadb shell su - once SU into the adb shell copy the
kernelandramdisk.imgfiles to the android x86 folder - Note: I copied the oldkernelandramdisk.imgfile into a folder called “old” as a backup in case something goes wrong.cp /sdcard/Download/kernel /data/local/tmp/root/android-9.0-r2/ cp /sdcard/Download/ramdisk.img /data/local/tmp/root/android-9.0-r2/ - IMPORTANT - make sure the file permissions are the same as the previous files
cd /data/local/tmp/root/android-9.0-r2/ chmod 644 kernel chmod 644 ramdisk.img - unmount android x86 folder and remove the temporary folder we created in the emulator
adb -e shell "su -c 'umount /data/local/tmp/root'"
adb -e shell "rmdir /data/local/tmp/root"
8. Open the Magisk App
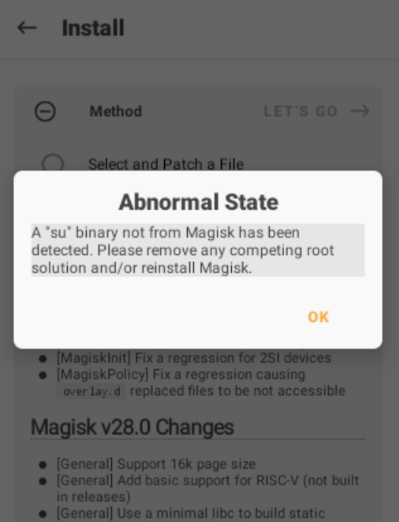
When you open the Magisk APP you should be able to see that a version of Magisk is now installed.
But note that you may get a warning about some problem as shown below. Personally I ignored them as I was able to root the emulator either way.
IMPORTANT NOTE - You might not be able to install some modules, but your emulator will still be rooted. I tried installing some modules and ran into errors, but I was able to install LSPosed.

NOTE - If you want to install LSposed you need to enabled zygisk in the settings before installing the module
References
- https://web.archive.org/web/20190630142221/https://asdasd.page/2018/02/18/Install-Magisk-on-Android-x86/
- https://xdaforums.com/t/guide-discussion-modifying-android-x86-rooted-with-magisk.4077477/