Table of Contents
One can use Appium to automate tasks on a mobile device - be it Android or iOS. In this tutorial we will be automating a task on an Android device, but can also work it iOS just by changing the configuration.
What you need
- Java
- Android SDK
- Appium or Appium Desktop (will act as the appium server)
- A Mobile device, connected to your computer (you can use an emulator too)
- Appium Doctor (optional)
Operating System used: Ubuntu 18.04
Installing Appium Doctor (Optional, but highly recommended)
We use Appium doctor to ensure we’ve installed all the dependancies we need to ensure that appium is running smoothly. Whilst this is not necessary, I strongly recommend this as it can save a lot of head scratching and fustration.
Note: I use nvm to manage my node versions and npm versions
# You need npm to install appium doctor
npm install appium-doctor -g
appium-doctor
At first you will get the following kind of screenshot:
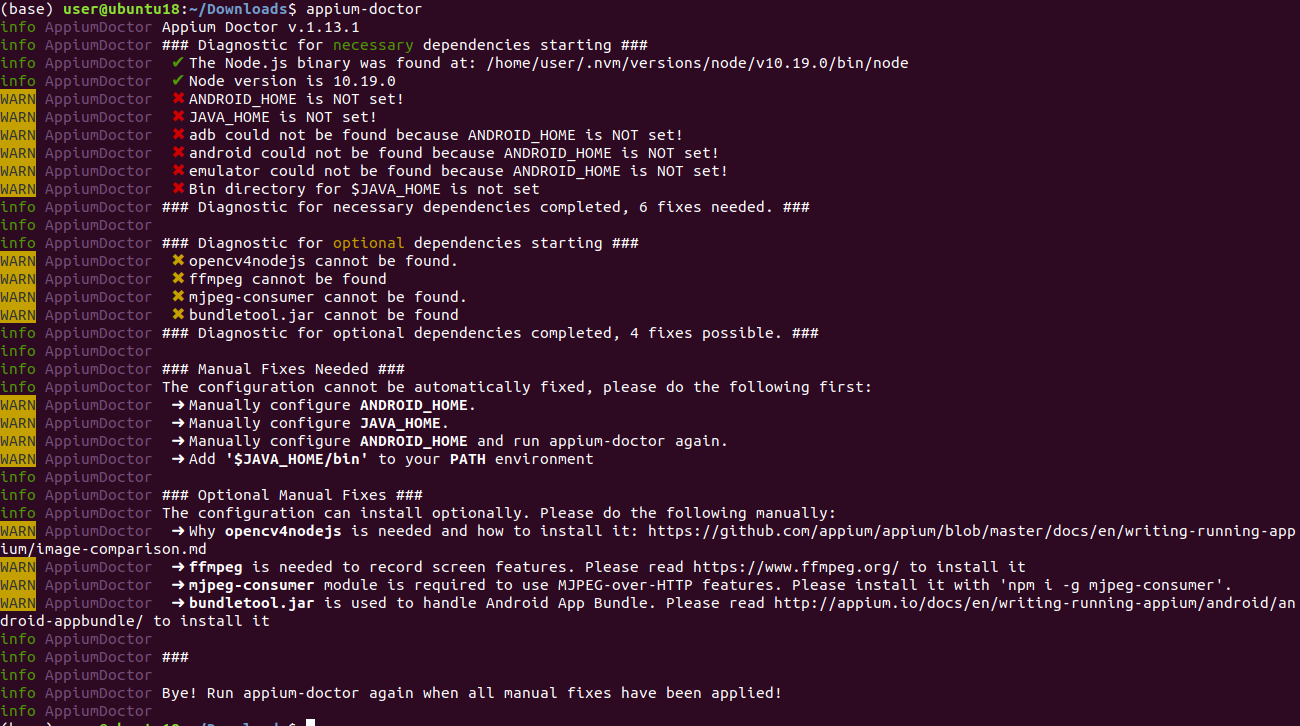
You will notice that there are bunch of things missing. In our case, we just need to set the JAVA_HOME, ANDROID_HOME and make sure adb is installed
Installing Java and Android SDK
First, we install java and android sdk.
sudo apt update
sudo apt-get install openjdk-8-jdk android-sdk
then add the following lines to ~/.bashrc file:
export ANDROID_HOME=/usr/lib/android-sdk/
export PATH=$PATH:$ANDROID_HOME/tools

export JAVA_HOME=/usr/lib/jvm/java-8-openjdk-amd64/
export PATH=$PATH:$JAVA_HOME/bin
then run:
source ~/.bashrc
run appium-doctor again and this time appium doctor will result in:
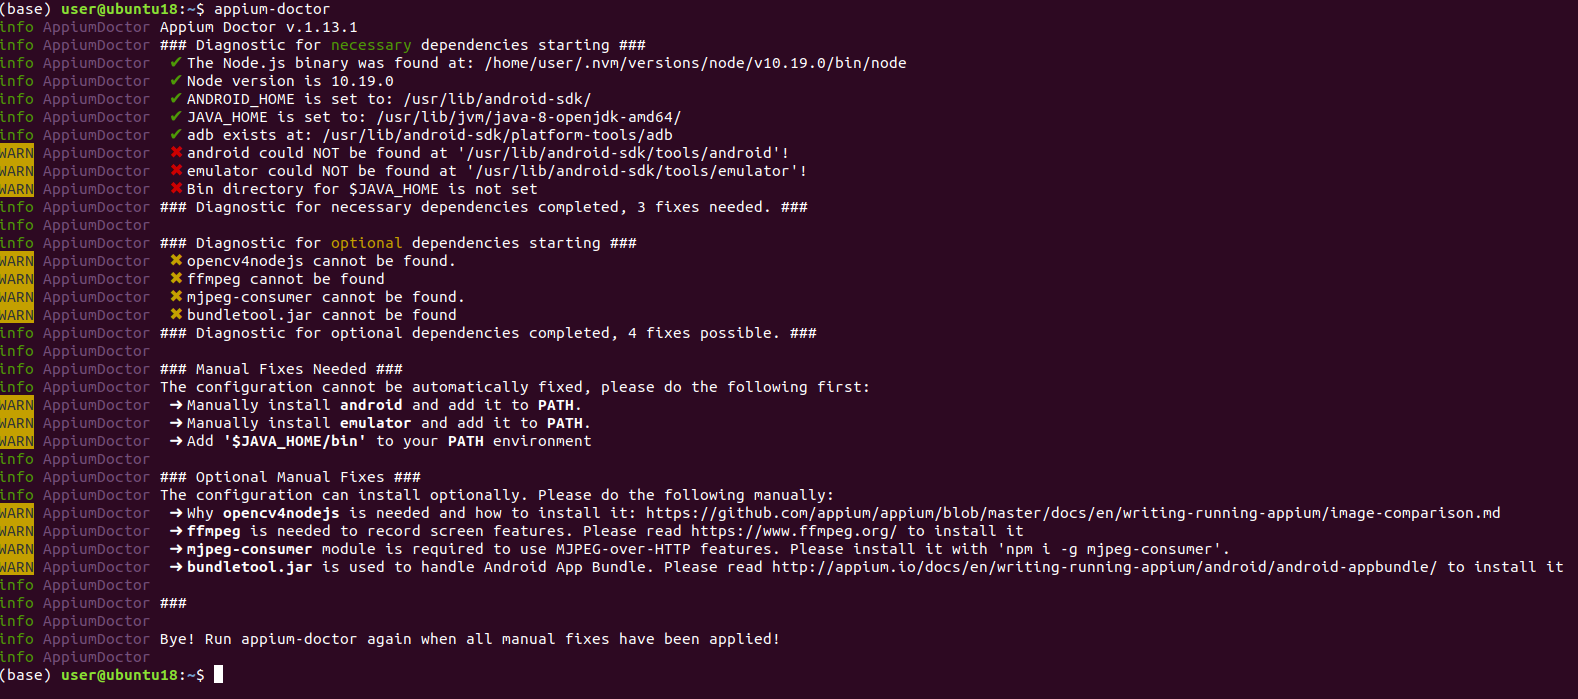
With that, we have JAVA_HOME, ANDROID_HOME and adb set.
Installing Appium Server
The Appium server receives commands (from our scripts) and sends commands to adb which in turn runs actions on the connected mobile device. you can download the normal Appium server, but I highly recommend - and for this tutorial, we will download and use Appium Desktop. It’s the same as the normal appium server but it comes with a very handy GUI which will help us when it comes to building our automation/tasks scripts.
First Test: Opening Google Chrome Browser using Appium Desktop
At this point we should have everything setup.
Run adb devices to start the ADB server. If this is the first time you are connecting a mobile device to adb, it will prompt you for authorization on the device, make sure to accept.
The result will look something like this (as long as it says “device”):

Next open Appium desktop:
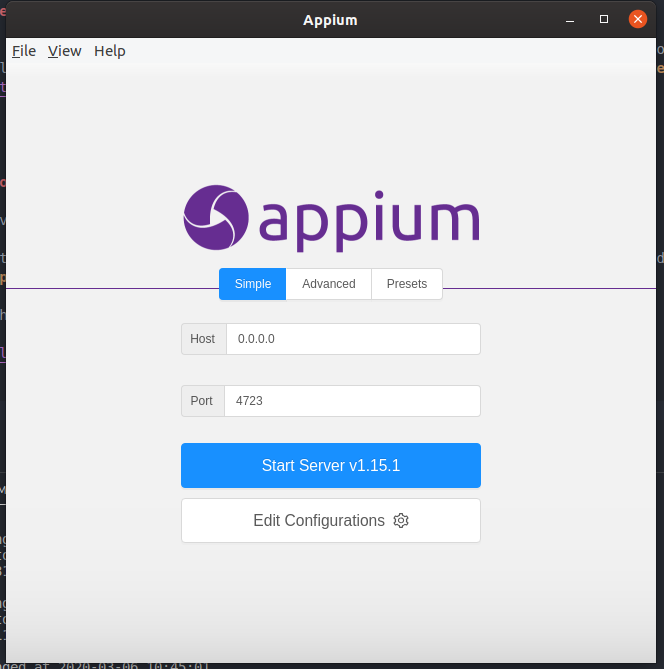
Leave the Host and port to the default values (posrt should be 4723 by default) and click Start Server
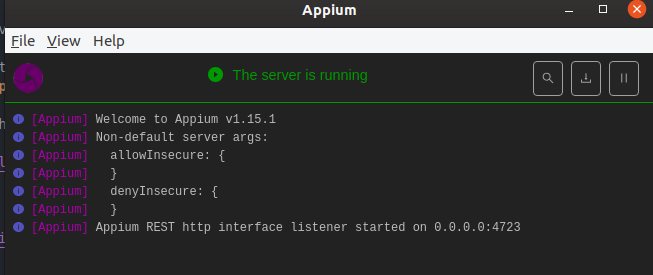
Click the “magnify” button icon and this will start the Appium Inspector

On the “JSON Representation” section, click the “edit” icon and copy the following (change the platform version to the Android OS version installed on your mobile device):
{
  "appPackage": "com.android.chrome",
  "appActivity": "com.google.android.apps.chrome.Main",
  "platformName": "Android",
  "platformVersion": "10",
  "deviceName": "device",
  "noReset": true,
  "fullReset": false
}
Make sure to click the “save” button, make sure the mobile device is unlocked and then click Start Session.
This should open Google Chrome browser on your mobile device (provided it’s already installed):
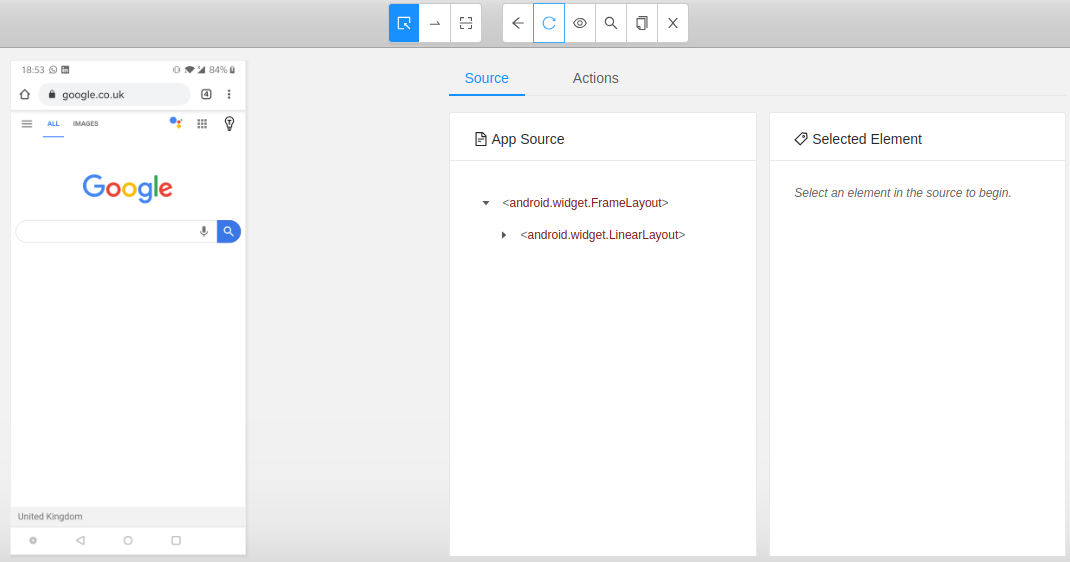
You can then click on different parts of the screenshot and it will show you the element details. This is useful as it gives us information used for constructing our appium scripts.

Second Test: Running an example python script
For this next part we need to keep the Appium server running, but close the Appium Inspector that we opened (if you followed the last section). Also run adb devices again just to check our mobile device is still connected.
Install Appium Python Client
We will code our appium script in Python. To run our Appium script in python, we need to install the Appium Python Client pip package (make sure you have pip and Python installed).
pip install Appium-Python-Client
Tip: Highly recommend you setup up an anaconda/miniconda/virtualenv envrionment. When you work with multiple python projects you’re going to be working with different dependencies and python versions, so it’s highly recommended you keep them seperate using an environment
Run the example script
I have created a test script that you can run here. This script will open chrome browser on your mobile device, search google for “toptechtips.github.io” and then it will click on the first result.
Note: make sure to change the platformVersion in the variable desired_caps to the android OS version running on your mobile device. This script was tested on a OnePlus 6, running Android 10.
The script.py (at the time of writing this) looks like this:
# Simple Example Appium script

from selenium.webdriver.common.by import By
from selenium.webdriver.support.ui import WebDriverWait
from selenium.webdriver.support import expected_conditions as EC
from appium import webdriver
from time import sleep

if __name__ == "__main__":

    desired_caps = {
        'appPackage': 'com.android.chrome',
        'appActivity': 'com.google.android.apps.chrome.Main',
        'platformName': 'Android',
        'deviceName': 'device',
        'platformVersion': '10',
        'noReset': 'true',
        'fullReset': 'false'
    }
    try:
        # Start driver for chrome browser
        driver = webdriver.Remote('http://127.0.0.1:4723/wd/hub', desired_caps)

        sleep(1)

        # Find url bar and click it
        url_bar = driver.find_element_by_id('com.android.chrome:id/url_bar')
        url_bar.click()

        sleep(1)

        # Enter google address
        url_bar.send_keys('google.com')

        sleep(1)

        driver.press_keycode(66)

        sleep(1)

        # We wait for the presence of the google search bar before doing anything else
        # We use Selenium's to wait for some time until the search bard has loaded
        # There is no ID for the search box so we use a bit of XPath to look for it

        search_box_xpath = '//android.view.View/android.widget.EditText'
        WebDriverWait(driver, 10).until(EC.presence_of_element_located((By.XPATH, search_box_xpath)))

        search_box = driver.find_element_by_xpath(search_box_xpath)
        driver.set_value(search_box, "toptechtips.github.io")

        # After entering the text into the search bar we then click search and wait
        # for the next page to load

        # We look for a widget Button with the text value 'Google Search'
        search_button_xpath = "//android.widget.Button[contains(@text, 'Google Search')]"
        driver.find_element_by_xpath(search_button_xpath).click()

        # After we click the search button, we must wait for the search results container to appear
        search_results_container_xpath = "//*[contains(@resource-id, 'rso')]"
        WebDriverWait(driver, 10).until(EC.presence_of_element_located((By.XPATH, search_results_container_xpath)))

        # To get each result item, we first look for the container with the resource-id "rso"
        # Then the 2nd part of the xpath string will anything that is "a view of a view of a view"
        search_result_items_xpath = "//*[contains(@resource-id, 'rso')]//android.view.View/android.view.View/android.view.View"

        # Note how we use "find_elements..." instead of the usual "find_element"
        search_results = driver.find_elements_by_xpath(search_result_items_xpath)

        # We then only want to click on the first result
        first_result = search_results[0].click()

        # We can then scroll, or even screenshot...

    except Exception as e:
        print("Script Error: {0}".format(e))
Run the script and you should see some magic…
Hope this helps you get started with automating your very own appium scripts/tasks on your mobile device.
Bonus: Instead of using a physical mobile device, you can use an emulator (I recommend Android-x86). Just do adb connect <ip address of emulator> and that will connect your emulator to the adb server.
Kind Regards,
John