Table of Contents
In this post, we look at how we can create a website form that pushes user input to a (Firebase) Database.
OK, so why can’t I just use some other free online form services and embedded it to my website?
- Having your own form gives you a lot more flexibility in terms of form design and function.
- Firebase is free (and it’s a Google service!) and very easy to integrate to your site.
- For static websites (e.g. Github Pages, Jekyll Sites, Hugo Sites) that don’t have a local database, this allows user-input data to be stored and accessed outside of the site.
What do we need to do?
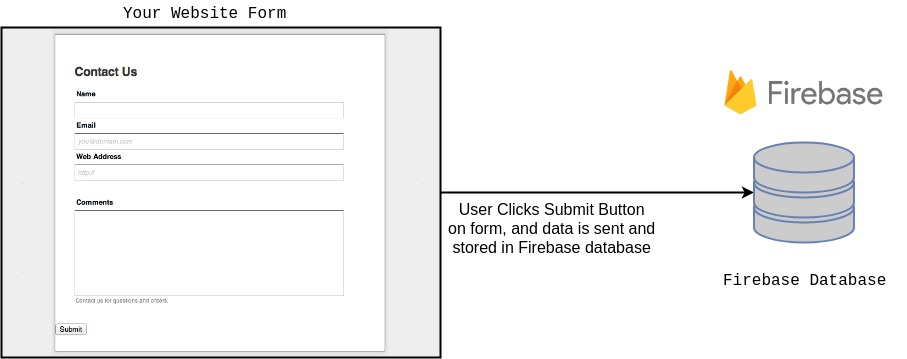
Here’s a quick diagram of what we’re trying to achieve:
1. Create a Firebase project
To use Firebase, you need a google account. Head over to Google Accounts (If you don’t trust this link, just google: “Create a google account”).
- Go to Firebase.
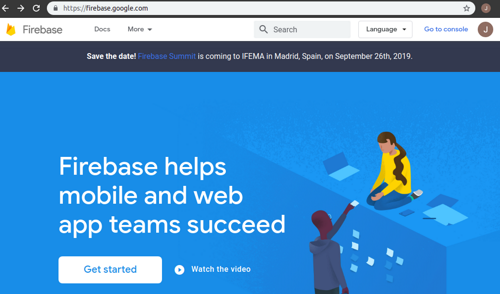
- Click “Get Started”, Then “Add Project”.
- Enter a project name (For this exmaple I used, “test-project”).
- Select the Analytics location, or leave it to its default value.

And with that, your Firebase project is created.
2. Create a Firebase Database for you project
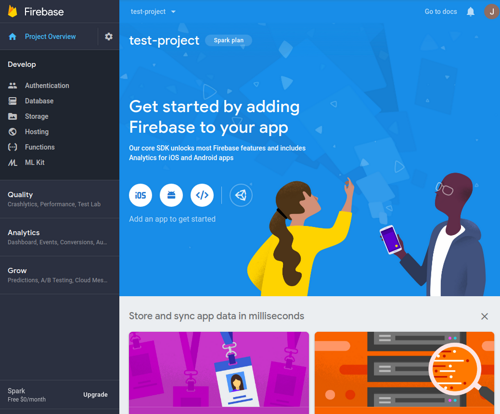
You will now see your Project on your Firebase Dashboard.
- Click on your project to navigate to your project.
- On the left side bar, click on Database.
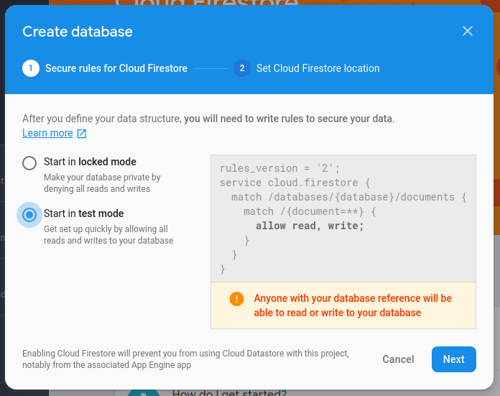
- On the Database page, click on Create Database.
NOTE: To keep things simple, we will enable test-mode so that we don’t need authentication to push data to our database. Obviously, we would implement a more secure way to push data, but we will leave that for another post.
- Select the Cloud Firestore Location.
2a. Create a Firestore Collection (Optional)
Firestore is the successor of the earlier version of Firebase so I will use the term “Firebase” and “Firestore” interchangibly.
You can create a collection yourself, by clicking “Add Collection” and adding some fields. But for this post, we don’t need to as Firebase allows us push data without any sort of Collection definition/mappings to be defined.
3. Connect Firebase to website
Before we create our html we need to make sure that we have the necessary requirements to connect it to Firebase
- Navigate to Project Settings (the cog icon on the left side bar).
- Add an app - Click on the code icon (looks like this “</>”).
- Enter an app nickname (for this example, we use test-site).
- Firebase will then generate some Javascript code for you to add to your website
It will look similar to this format:
<!-- The core Firebase JS SDK is always required and must be listed first -->
<script src="https://www.gstatic.com/firebasejs/6.2.4/firebase-app.js"></script>

<!-- TODO: Add SDKs for Firebase products that you want to use
     https://firebase.google.com/docs/web/setup#config-web-app -->

<script>
  // Your web app's Firebase configuration
  var firebaseConfig = {
    apiKey: "<__YOUR_API_KEY__>",
    authDomain: "<__YOUR_AUTH_DOMAIN__>",
    databaseURL: "<__YOUR_DATABASE_URL__>",
    projectId: "<__YOUR_PROJECT_ID__>",
    storageBucket: "<__YOUR_STORAGE_ID__>",
    messagingSenderId: "<__YOUR_MESSAGING_SENDER_ID__>",
    appId: "<__YOUR_APP_ID__>"
  };
  // Initialize Firebase
  firebase.initializeApp(firebaseConfig);
</script>
Note that the javascript libraries in the generted script are CDN-based. You can change them if you wish to save the Firebase libraries locally.
4. Create HTML form
To create the form, we will use:
- HTML to define the form and its fields
- CSS to style the form
- JavaScript for getting the user input values and sending them to Firebase
Note that, to keep things simple we won’t implement form validation. We will assume that the user input will always be valid.
IMPORTANT: Make sure to include the Firebase-app (core) and Firebase-firestore libraries (included in the full code):
<script src="https://www.gstatic.com/firebasejs/6.2.4/firebase-app.js"></script>
<script src="https://www.gstatic.com/firebasejs/6.2.4/firebase-firestore.js"></script>
Full Code (For the copy-pasters):
<!DOCTYPE html>
<html lang="en" dir="ltr">
  <head>
      <style media="screen">
        /* Style inputs */
          input[type=text], input[type=email], textarea {
          width: 100%;
          padding: 12px 20px;
          margin: 8px 0;
          display: inline-block;
          border: 1px solid #ccc;
          border-radius: 4px;
          box-sizing: border-box;
        }

        /* Style the submit button */
        button {
          width: 100%;
          background-color: #4CAF50;
          color: white;
          padding: 14px 20px;
          margin: 8px 0;
          border: none;
          border-radius: 4px;
          cursor: pointer;
        }

        /* Add a background color to the submit button on mouse-over */
        input[type=submit]:hover {
          background-color: #45a049;
        }
      </style>
  </head>
  <body>
    <form>
      <label for="name">Name</label>
      <input type="text" id="name" name="name" placeholder="Your name..">

      <label for="email">email</label>
      <input type="email" id="email" name="email" placeholder="Your email..">

      <label for="message">Subject</label>
      <textarea id="message" name="message" placeholder="Write something.." style="height:200px"></textarea>

      <button id="submit_msg" type="button">Submit</button>
    </form>
  </body>
  <script src="https://www.gstatic.com/firebasejs/6.2.4/firebase-app.js"></script>
  <script src="https://www.gstatic.com/firebasejs/6.2.4/firebase-firestore.js"></script>
  <script type="text/javascript">
    (function() {
      var firebaseConfig = {
        apiKey: "AIzaSyDkSrYYvFWILqdDoR7EZXEHYnYaRHE5sRc",
        authDomain: "test-project-1da79.firebaseapp.com",
        databaseURL: "https://test-project-1da79.firebaseio.com",
        projectId: "test-project-1da79",
        storageBucket: "test-project-1da79.appspot.com",
        messagingSenderId: "1000904167202",
        appId: "1:1000904167202:web:4be8aeda422da522"
      };

      firebase.initializeApp(firebaseConfig);

      var push_to_firebase = function(data){
        alert("Thanks for sending a message. I'll try and get back to you as soon as possible.")
        var db = firebase.firestore();

        db.collection("messages").add({
            name: data["name"],
            email: data["email"],
            message: data["msg"],
            timestamp: Date.now()
        })
        .then(function(docRef) {
            console.log("Message sent, ID: ", docRef.id);
            location.reload();
        })
        .catch(function(error) {
            console.error("Message could not be sent: ", error);
        });
      }

      var contact_submit = function(){
        var name = document.getElementById("name");
        var email = document.getElementById("email");
        var msg = document.getElementById("message");

        var data = {
          "name": name.value,
          "email": email.value,
          "msg": msg.value
        }
        push_to_firebase(data);

      }

      document.getElementById("submit_msg").addEventListener("click", contact_submit);
    })();
  </script>
</html>
JavaScript Functions Explained
1. Listen for the button click
The submit button <button id="submit_msg" type="button">Submit</button> is type="button" instead of the traditional form type="submit". The reason for this is because type="submit" is when we set the form action to a .php file. We’re not executing any .php (because we’re using JavaScript). If we use type="submit", the page will redirect before the JavaScript gets executed, hence nothing will get pushed to firebase.
// Listen to the submit button (id=submit_msg).
// When teh submit button is clicked run the contact_submit() function
document.getElementById("submit_msg").addEventListener("click", contact_submit);
2. Grab the values of the form fields
Our form consists of 3 form fields:
type="text"input field for grabbing user’s nametype="email"input field for grabbing user’s emailtextareafield for grabbing user’s message
After the submit button is pressed the contact_submit() function is fired. This function uses the ID of the form fields to capture the values inside them:
var contact_submit = function(){

  //Gets Value of form HTML elements
  var name = document.getElementById("name");
  var email = document.getElementById("email");
  var msg = document.getElementById("message");

  //Stores those values in a object
  var data = {
    "name": name.value,
    "email": email.value,
    "msg": msg.value
  }

  //Passes values to be pushed to Firebase
  push_to_firebase(data);

}
3. Push our input values to Firebase
This is probably most complicated part of the code. Firebase (and a lot of other modern libraries) use method chaining (or Promises chaining, in this case). If you’re not familiar with Promises I advise to read up.
The breakdown of the JS function:
-
Initialize
dbvariable withfirebase.firestore()` -
Specify the collection (kind of like a table, in database terms) with the
.collection() -
Use
.add()(because we want to auto-generate the document ID) function to make a HTTP REST call to the Firestore API and push data to our specified collection. Note that we provide a “timestamp” field to store the current time stamp usingDate.now() -
The
catch()function will execute if theadd()function fails to push our data to Firebase. We will alert the user that the data did not get sent -
The
then()function will execute when theadd()function succeeds. We usealert()to inform the user that their message has been sent. and thenlocation.reload()to reload the page
Here’s a link to Firebase Docs for more details on the Firebase and Firestore API.
var push_to_firebase = function(data){
  var db = firebase.firestore();

  db.collection("messages").add({
      name: data["name"],
      email: data["email"],
      message: data["msg"],
      timestamp: Date.now()
  })
  .then(function(docRef) {
      console.log("Message sent, ID: ", docRef.id);
      alert("Thanks for sending a message. I'll try and get back to you as soon as possible.")
      location.reload();
  })
  .catch(function(error) {
      alert("Message Could not be sent")
      console.error("Message could not be sent: ", error);
  });
}
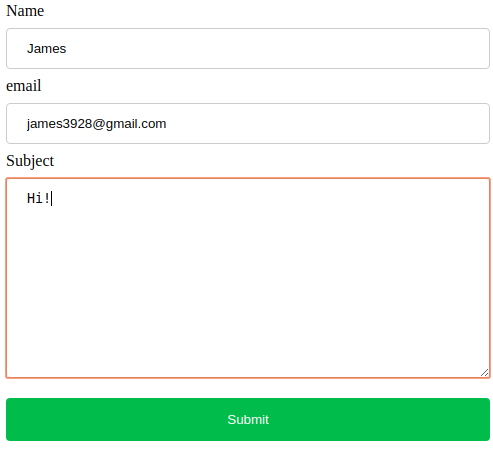
The Finished Form
The finished form should look like this:
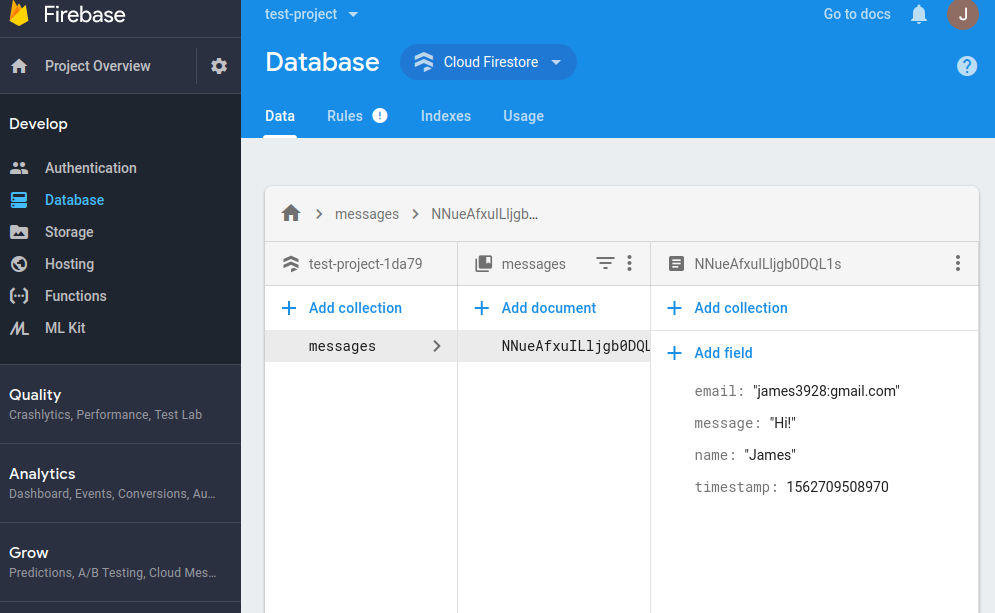
And when you go to your Firebase console, you will the data you enter on the “messages” collection: